Icebox Banana Pudding

BPI reached way back in my recipe box this past weekend for this Southern delight! By way back I mean I’ve had this recipe for over 30 years… Even the title signifies it’s an old recipe. You don’t hear the refrigerator called an “icebox” these days! There was a sweet older woman in our church in Athens, Georgia named Miss Lillie Bell, and this is her recipe. When I was a young wife and mama she was a mentor to me, but I didn’t realize that’s what was happening at the time. All I knew was that she loved me. She just quietly came alongside and helped me with my two young boys. She worked in a mill that made clothes for children and she literally provided clothes for my boys when they were toddlers.  She made teacakes for my husband Gary too – that will be another post for another time!

I brought this banana pudding to work yesterday to celebrate working surviving 🙂 one year in the Superintendent’s office. (See yesterday’s post!) Here is the recipe for you:

ICEBOX BANANA PUDDING

  • 2 four-serving sizes of Jell-O Vanilla Instant Pudding Mix
  • 3 cups of cold milk
  • 1 can of Eagle Brand condensed milk
  • 1 large container of Cool Whip
  • 1 box of Nilla Wafers (no off brands please)
  • 6 to 7 bananas

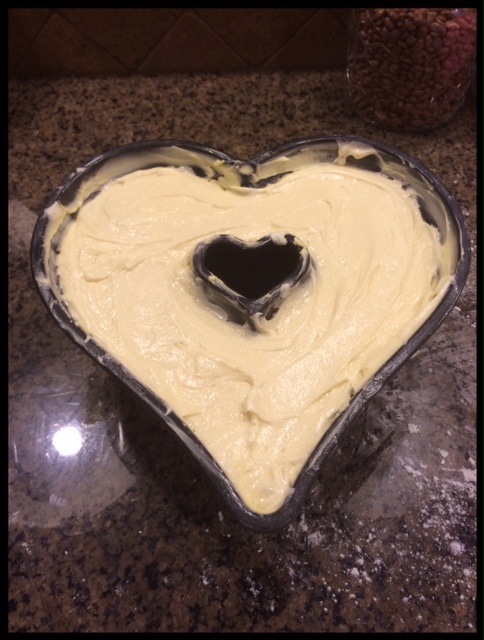
I layer mine in a trifle bowl – wanted you to know that first!

  1. Using a mixer (I use a hand mixer) mix the instant pudding mix and 3 cups of cold milk in a large bowl.
  2. Pour the Eagle Brand milk in the pudding mixture, continue to mix until creamy and well blended.
  3. Now add 1/2 to 2/3 of the Cool Whip (save enough to spread on top) to the pudding mixture and mix well.
  4. Layer in this order: vanilla wafers, bananas, pudding, vanilla wafers, bananas, pudding…repeat!
  5. Top with Cool Whip.
  6. Chill at least 4 hours or overnight is best.

GranJan-BlogSignature

Share

Cream Cheese Pound Cake – Recipe

Yesterday was my sweet husband’s birthday and that man of mine dearly loves a pound cake, so I made a special one for him using my heart-shaped pan. You can order one for yourself by visiting this Williams-Sonoma Site.IMG_8978

RECIPE
Cream Cheese Pound Cake
3 cups sugar
3 sticks butter (softened – room temperature)
1 8-ounce block of cream cheese (softened – room temperature)
6 large eggs (room temperature)
1 teaspoon vanilla

3 cups White Lily all purpose flour (sifted)
1/4 teaspoon salt

1. Butter and flour the pan generously. [I used Butter Flavor Crisco, but Baker’s JOY spray is my go-to.]
IMG_8993

2. Whip sugar, softened butter and cream cheese well.
[I LOVE THIS MIXER. It literally makes me so happy to use it. Baking becomes an EVENT, not a routine thing. And celebrating my wonderful husband’s birthday and love for pound cake is an event in itself! AND did I mention it was also Valentine’s Day while I was baking?]IMG_8990

3. Add eggs one at a time, mixing after each addition.

4. Add vanilla.

5. Lower mixer speed, and slowly add sifted flour and salt.

6. Pour batter into pan. (It is a thick batter, so it is more of a “spooning” into the pan.)IMG_89917. Place in a cold oven and set temperature to 300 degrees. Bake for 1 and 1/2 hours.

There was too much batter for this pan, so the cake began to rise over the top of the pan…  WOW! It rose so high I literally sliced the top off before I turned the cake out of the pan! Gary loved eating that buttery crunchy top. IMG_8992

8. Let cake cool about 10 minutes in pan and then gently turn onto a platter or cake plate.

Happy Birthday to my wonderful husband, Gary. I love him so much and I’m so thankful he loves my cooking and is enjoying his pound cake. These are the beautiful pink roses he gave me for Valentine’s Day. He had them waiting at the table when we went out to dinner.IMG_8979

I close with this beautiful picture of the clouds set in the shape of a heart framed by the valley and mountains. Enjoy your loved ones, make time to bake their favorites and celebrate love and family. Each day is a gift and treasure from the Good Lord.IMG_8994

Job 37:16 (NLT)
Do you understand how he moves the clouds
    with wonderful perfection and skill?

Share

Blackberry Cobbler & 37 Years of Marriage!

Cobbler

It’s been a great week – Gary and I celebrated 37 years of marriage this past Wednesday on June 11th.  I’m thankful for my sweet husband…for the way he leads and loves. I had no idea as a young 19-year-old bride what a great man he was. I just knew I loved him and wanted to be his wife. God in His great plan for me unfolded a happy home that now includes two sons, two daughters-in-love, and five amazing grandchildren.  All because two young people fell in love and got married.  Here we are…about to begin our journey.  We’d only just begun…  I wish you could see Gary’s baby blue leisure suit because it matched the baby blue Pinto car.  He was also very proud of his white patent leather boots that matched his wide white belt.  And the platform wedge shoes I had on? They are back in style today!

PINTO

Today before church the discussion turned to cobblers as a group of us ladies were in the choir room.  Some of us cook the fruit, some don’t, some of us sweeten the fruit, some don’t.  All I know is last night I made a blackberry cobbler that my husband told me was the BEST I HAD EVER MADE! So I wanted to share my recipe that happens to be the way my mama and my Granny also made cobblers.  Starting with these beautiful berries right from my garden sure made it even more wonderful!

Blackberries

BowlofBerries

I have posted my recipe for CHOCOLATE COBBLER on my blog as well as my recipe for PEACH COBBLER if you want to see those recipes.  The blackberry cobbler recipe below is identical to the peach cobbler recipe, but I didn’t take pictures while making it last night as our “Father’s Day Celebration” grew and Gran Jan had to hurry! [First it was just me and Gary and my mom and dad. Then my younger sister Jo called and had a change of plans, so she came. Next we heard from our son Jonathan and he and his wife and two children came, so the party of four quickly turned into a party of 9!]  It was great except for I sure missed my Cartersville Crew…

BLACKBERRY COBBLER – 9″ x 13″ casserole dish or 12″ cast iron skillet

FRUIT
4 cups of fresh blackberries
2 cups of water
1 cup of sugar

CRUST – the good part!
1 and 1/2 sticks of butter
1 and 1/2 cups of self-rising flour (I use White Lily)
1 and 1/2 cups of sugar 
1 and 1/2 cups of whole milk 
1. Pre-heat your oven to 350 degrees.
2. Put the 1 1/2 sticks of butter into your 9×13 baking dish or a 12″ cast iron skillet (my preference), and slide into the oven to melt completely.
3. Rinse the blackberries and check them to remove leaves, stems, etc., drain well.
4. Now make a “simple syrup” by bringing the 2 cups of water and 1 cup of sugar to a boil until the sugar dissolves. Stir well.
5. Add the blackberries to the simple syrup and simmer 4-5 minutes.
6. After simmering, remove the blackberries/simple syrup pan from the heat and set aside.
7. Now take a wire whisk and mix the self-rising flour and sugar well, removing ALL lumps! 
8. Then pour the 1 1/2 cups of milk to the sugar/flour and whisk until creamy. It will be thin – that is fine! Just make sure it is mixed well – no lumps. No lumps! 
9, Remove the baking dish with the hot melted butter from the oven, and gently pour the flour/sugar/milk “batter” over the melted butter in the pan. DO NOT STIR the batter into the butter.  I repeat – DO NOT STIR!
10. Now spoon your simmered blackberries over the batter so they are evenly placed. Gently pour in the simple syrup. DO NOT STIR! You don’t have to use all the syrup, but trust me, it will be so good if you do! The cobbler will be juicy and not dry.
11. Slide the 9 x 13 casserole or skillet into your pre-heated oven and bake until bubbly and browned on top, about 45 minutes.
The Beautiful Crust (it deserves to be capitalized) will rise up through the berries and will be so delicious!
Serve warm and topped with vanilla ice cream.
This has been a great weekend that began Saturday morning with coffee on the front porch and ended this evening with sitting in the swing by the pond while Gary fished a bit off the bank. There was also blackberry cobbler making, an awesome time of worship at church, playing with grandkids, honoring my dad and husband for Father’s Day today, and even weeding the garden! Life’s simple pleasures really are the best, so don’t forget that vanilla ice cream on the cobbler… 
GRANJAN
Share

Jalepeno Cornbread Recipe

Muffins-Tin
Muffins-Plate

I love cornbread and I love spicy food. So jalepeno cornbread is my favorite as I especially love jalepeno peppers. When I make this cornbread, I add in lots of chopped pickled jalepenos.  My recipe makes 12 muffins or a 10-12″ cast iron skillet of cornbread.

Gran Jan’s Jalapeño Cornbread

Ingredients:

  • 2 beaten eggs
  • ¼ Cup corn oil
  • 1 Cup buttermilk
  • 1  medium to large onion, diced
  • 1 14.5 ounce can of creamed corn
  • 2 Cups self-rising cornmeal – White Lily preferred
  • 1 cup sharp cheddar cheese (freshly grated)
  • 4-5 Tablespoons of diced pickled or fresh jalapeños (or less or more)

Prepare:
1.  Mix eggs and oil together, whisking until well blended.

2.  Pour in buttermilk, add diced onion, and then fold in creamed corn.
3.  Next add cornmeal and stir well. 
4.  Lastly, add shredded cheese and diced jalapeños. 
5.  Bake in a 450 degree pre-heated oven for about 25-30 minutes. Batter will be thick. You won’t be able to “pour” it out into the skillet, but it should not be too thick. You can add a splash of buttermilk if it seems too thick. You will learn the right consistency in time.

BAKING OPTIONS: Use a muffin tin or a cast-iron skillet.

You may pour about 1/3 to 1/2 cup of the batter into each tin of a greased muffin tin (makes 12), or use a  good old Southern cast-iron skillet two ways:

First and “easier/safer” is to grease your skillet with solid Crisco shortening and then sprinkle it with cormeal and scrape the batter from your mixing bowl into the cold skillet to bake, OR:

you can pre-heat your skillet with oil or shortening in the oven or on the stovetop until the oil is hot and “glistening.” When you scrape the cornbread batter into the skllet, it will sizzle and be so crunchy. Be so careful handling that hot skillet. I like to pre-heat my skillet on the stovetop so I only have to move it in and out of the oven one time! Skillets are heavy – be careful!

Jalepeno cornbread is so good with chili, soup, stew, or my favorite…a bowl of either pinto beans, great northern beans, or black-eyed peas!

I hope you make some soon!
GRAN JAN

Share

Tomato Sandwich – Southern Summer Staple!

Summertime in the South is wonderful with all the delicious fresh fruits and vegetables we enjoy…corn, okra, watermelon, butter beans, squash, cucumbers, blueberries, zipper peas, peppers, blackberries, cantaloupe, zucchini, peaches, green beans, purple hull peas, and of course, THE TOMATO! I planted 10 tomato plants this year in my garden. Below are the different varieties…Early Girl, Husky Red Cherry, Super Fantastic, Goliath, Big Beef, Park’s Whopper, and Better Boy. What fun names!
TomatoVarietiesWe had four ripe tomtatoes this week, and today for lunch I enjoyed eating my first tomato sandwich of the Summer of 2013. 🙂
TomatoSandwichFollowing is the “recipe” for a truly Southern delicacy, a tomato sandwich:
Ingredients:
Vine-ripened tomatoes
Mayonnaise (preferably Hellmans)
White bread (a must, although I did use “white wheat”)
Salt and Pepper

Directions:
1. Remove core from tomato and then slice.
2. Put mayonnaise on BOTH slices of the bread.
3. Carefully place tomatoes on bread, overlap if at all possible.
4. Salt and pepper the tomato slices.
5. Put one piece of bread on top of the other.
6. Carefully lean over the kitchen sink with your sandwich.
7. Say the blessing and thank God for your delicious tomato sandwich.
8. Take a bite and then let the juice run down your chin…

Happy Summer!

GRANJAN

Share

Delicious Meatloaf Recipe!

My tried and true recipe for MEATLOAF is a family favorite and really is delicious. I use a broiler pan to bake the meatloaf, and I believe it makes all the difference (fat drips out). [Be sure to spray both the top and bottom of the broiler pan with Pam for easy cleanup.] This is a great recipe that my youngest son Jonathan really likes.  His wife makes it for him now, and she’s a good cook. So sweet! This Southern woman knows it is especially good with side dishes of mashed potatoes, black-eyed peas and homemade biscuits. And steamed cabbage, yes that’s a favorite side of mine too. My recipe for homemade biscuits is right here.

MORTON MEATLOAF
INGREDIENTS:

  • 2 lbs. ground beef 
  • 3 eggs, beaten well
  • 1 medium onion diced (I cook the onion BEFORE I mix it in w/the ground beef.) I do this by placing the diced onion and a splash of canola oil or olive oil in a bowl and heating in the microwave for 3 – 4 minutes
  • ½ cup ketchup – or a tad more to preference, plus some extra to cover the top!
  • 1 sleeve of Ritz crackers, finely crushed (I put the crackers in a zip-loc bag and use my rolling pin to crush the crackers.)
  • 1 package of Lipton onion soup mix
  • Salt and pepper to taste
  • PREPARATION:
  • 1.  Preheat oven to 350 degrees.
  • 2.  Use broiler pan and spray both top and bottom pieces with Pam.
  • 3.  In large bowl:
                                  mix ground beef and beaten eggs
                                  add microwaved onions
                                  add ketchup
                                  stir in crushed Ritz cracker crumbs
                                  mix in the package of Lipton onion soup 
                                  salt & pepper to taste
  • 4.  Mix all ingredients well and form into a rectangular loaf and place on the broiler pan.
  • 5. Squirt 😊 ketchup over the top of the meatloaf.
  • 6. Bake through for 1 full hour. I use a meat thermometer and make sure the internal temp is 160 degrees.
  • Let the meatloaf sit/rest 5-10 minutes before slicing. I will sometimes return the meatloaf to a warm oven while I get the side dishes ready.
    Transfer to a serving platter before slicing.Happy Meatloaf Making!
    Gran Jan
Share

Beth Moore’s Gravy Recipe

Beth Moore is not only a great writer, Bible teacher, (and wife, mother and grandmother), the woman can cook. In her words she claims not to be “stellar,” but rather just a good country cook.  Well…those kinds of cooks are my favorite. My Granny and my parents are both great cooks. I’m a good cook myself – based on what my family tells me, and their estimation is all that matters to me.  In fact, my husband often says, “that was a feast” and it has become a family saying that especially tickles my daughter-in-law Erin.

Anyway, Beth wrote a great post on her blog this week about “Holiday Cooking Hints” and she and I had talked earlier in the day about doing a tutorial next year. How FUN! Go here for the complete post  with lots of great recipes and great ideas. Siestaville is the best blog community anywhere.  Following is her gravy recipe taken from the blog post:

Beth Moore’s Gravy Recipe

Now, for a few gravy hints. The drippings to a turkey are absolutely divine. After you’ve let the bird cool off enough to work with the drippings, tear open your roasting bag and use a cup or ladle to pour a generous amount into a measuring cup exactly like this:

See how the spout is at the bottom? The fattest part of the liquid will rise to the top after just a few minutes. You only want to use the bottom part to make your gravy or it’s too greasy. Set the filled measuring cup to the side until it’s time to make your gravy. Do you girls have iron skillets? They are best for making gravy but not imperative. You want it to be one of the last things you do before serving your meal. I’m going to tell you how to do basic gravy rather than giblet gravy so you’ll know how to make it from any roast whether beef, pork, or bird. I’ll leave giblet gravy to one of the other cooks on here.

Go back to your measuring cup of drippings. Pour that lower (less fat) half of your liquid in a skillet. Heat it up to a rolling boil. Depending on how much liquid you have in your skillet, put about a heaping tablespoon of flour (not into your pan yet!) into about a fourth cup of warm water and stir it up really well until the lumps are out. While the liquid in your skillet boils, pour in the flour mixture and stir constantly for at least several minutes. After it’s well mixed, decrease your heat to a low boil. Add some salt and pepper if the liquid needs it. (You can’t be afraid to taste it in process or it won’t be well seasoned.) The liquid in the skillet will all begin to thicken. Keep it boiling until it looks like gravy. Grin. And add some water – just a little at a time – until it has the consistency you’re looking for. Especially with any of my bird-gravies (chicken or turkey), I like to add no more than a dime-size of this:

It simply adds a little color. For those of you with access to a Williams Sonoma, however, this is absolutely FABULOUS (this is the only thing on here today you can’t get from a regular grocery store):

I pray you all have a wonderful Thanksgiving surrounded by loved ones and that you take the time to truly give thanks to our Great God for His goodness to us.  This past Sunday night at my church our interim pastor, Joel Southerland, actually had us physically write down our blessings. Since I’ve been “counting to 1,000” with Ann Voskamp on Multitude Mondays that was near and dear to my heart. I’ll be sharing my list soon. 

Happy Gravy Making!

Share